Integration with Google Consent Mode
Consent Mode V2 is an integration that maximizes control and transparency in managing user consent on your website: until the user has given consent, their data will not be saved.
WARNING: For any issues encountered during the integration of Google Consent Mode with the CMP, please reach out to our technical support team first at support@avacysolution.com. Google support will be involved only if necessary.
For more informations check the official Google documentation guide.
Google Consent Mode Basic vs Advanced
To use Google Consent Mode is essential to understand the difference in behavior and configuration between the two modes:
- Basic Consent Mode: Google tags are blocked from loading until the user interacts with the consent banner. No data is sent to Google before consent. If consent is denied, the tags are never fired.
- Advanced Consent Mode: Google tags load immediately (e.g., upon page initialization). Before the user grants consent, the tags function in a "restricted" mode: they do not read/write cookies but send cookieless pings containing consent status and non-identifying events. This allows Google to model conversions to recover lost data.
- Configuration Note: For Google Ads tags, you can further strip ad click identifiers (like GCLID) from these pings by ensuring
ads_data_redactionis set to true.
- Configuration Note: For Google Ads tags, you can further strip ad click identifiers (like GCLID) from these pings by ensuring
NOTE: Advanced mode involves data transmission (pings) before explicit consent, although no cookies are set. Consult your legal department regarding your specific jurisdiction.
Preliminary Steps: Activating Consent Overview
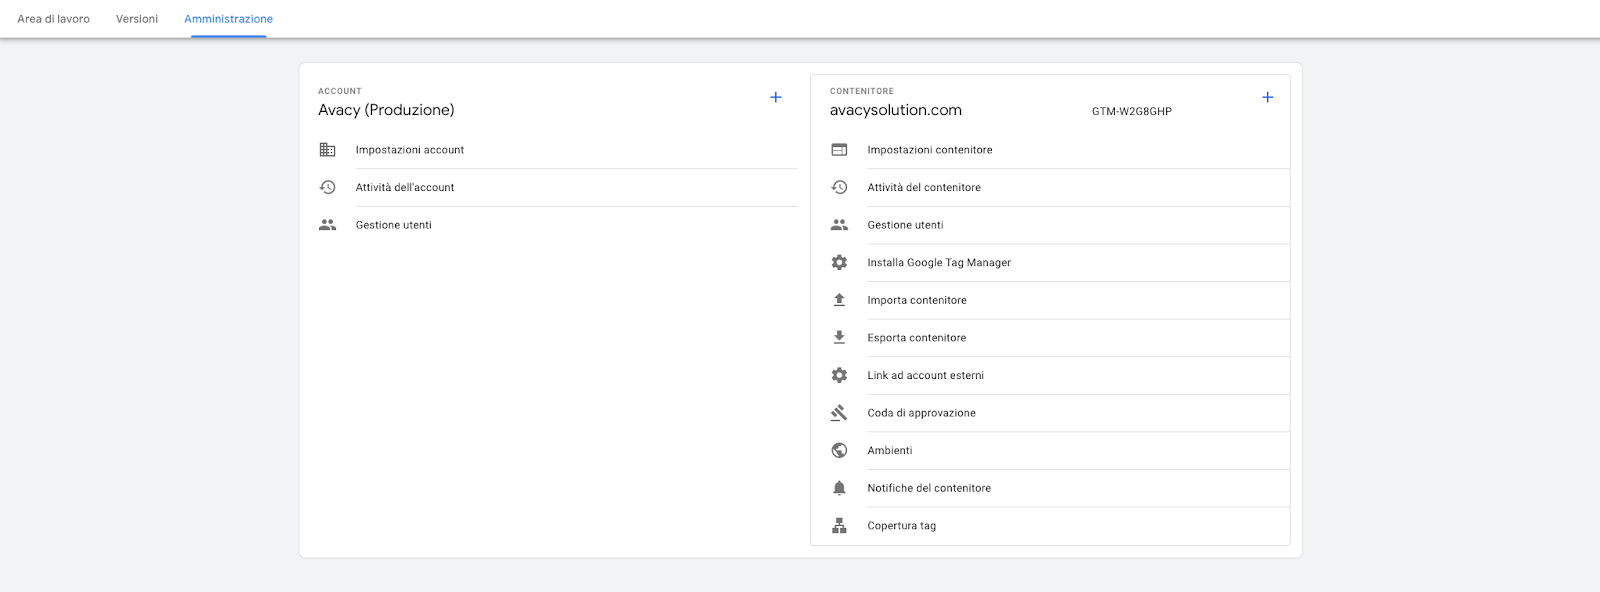
From the Google Tag Manager dashboard, click on Administration and then Container Settings
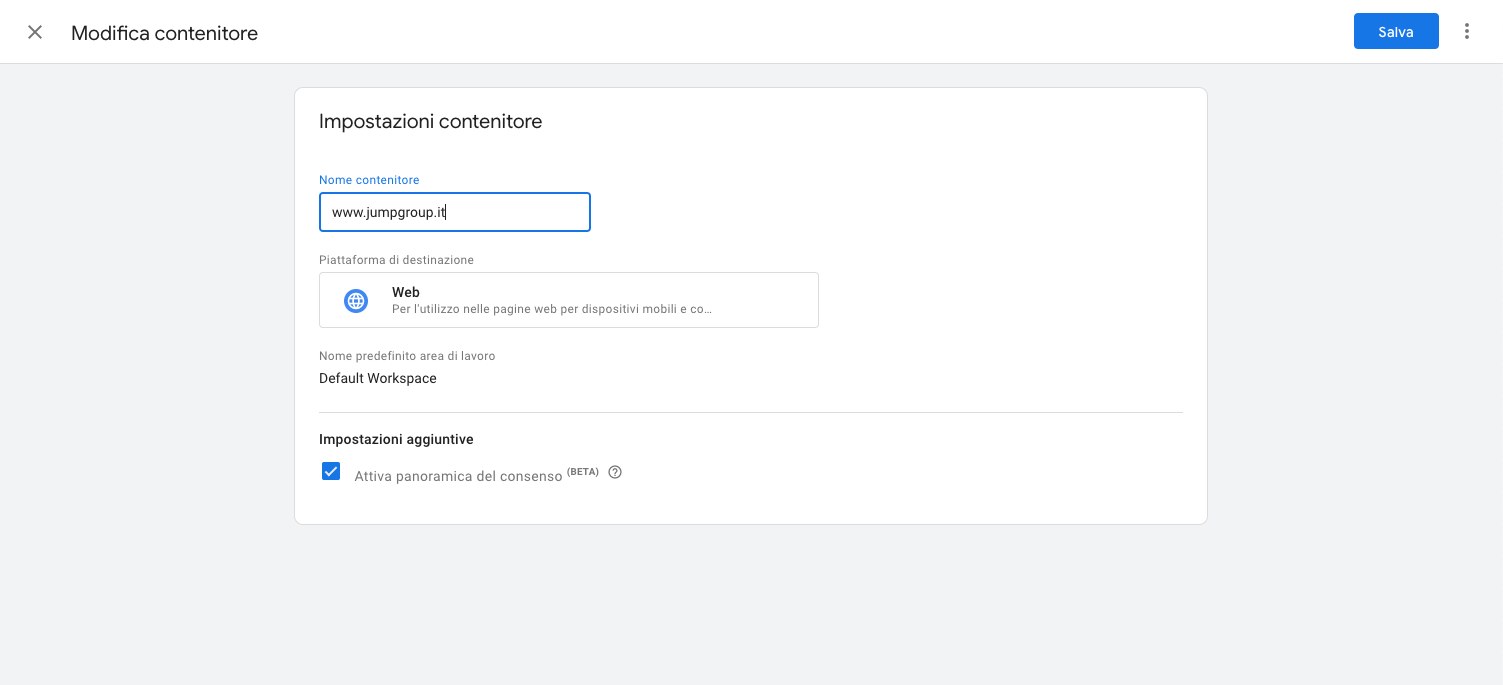
From here, check the box for Enable Consent Overview.
Preliminary Steps: Enabling Google Consent Mode Support on Avacy
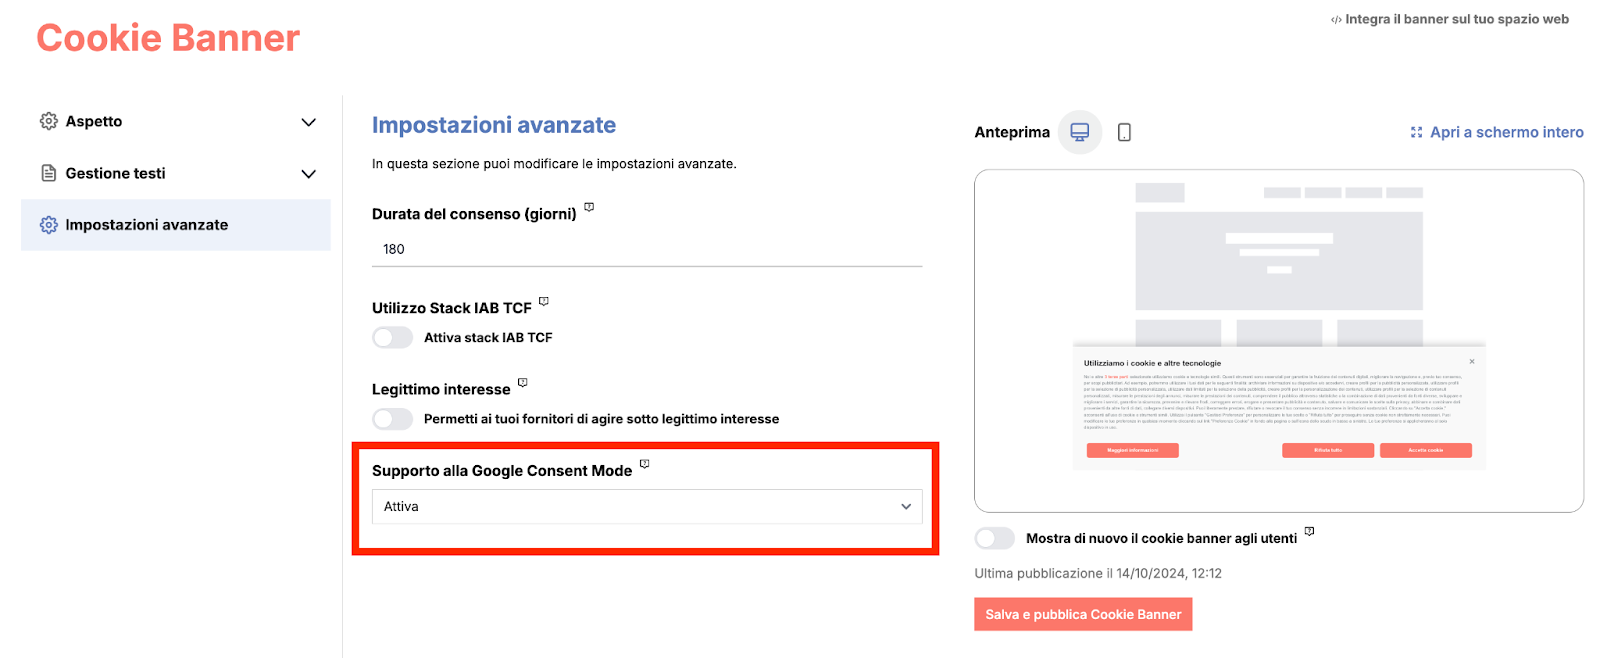
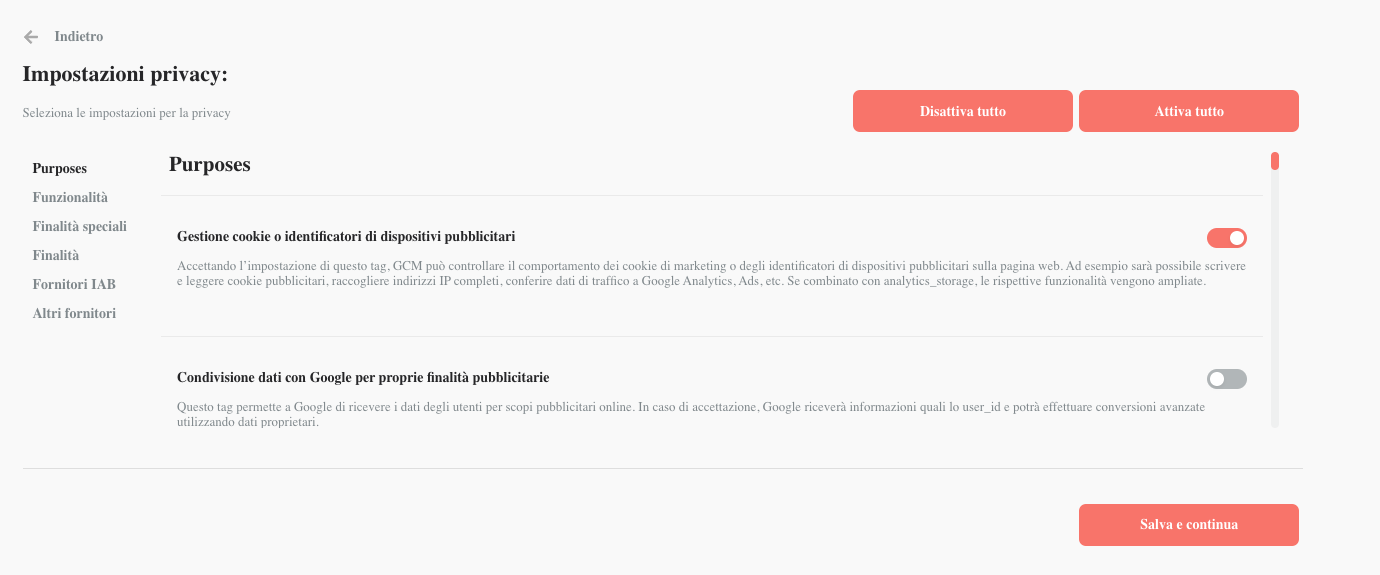
On the Avacy platform, go to the dashboard of the relevant website where you want to enable Google Consent Mode support. Go to the Cookie Banner section and, in the Advanced Settings, under Google Consent Mode Support, select Enable. This will allow a new section to appear in the cookie banner preferences panel, containing purposes for managing Google consent indicators.
The purposes in the Avacy cookie banner are associated with the consent indicators as follows:
| GTM Consent Indicator | Purpose on Cookie Banner |
|---|---|
| ad_storage | Managing cookies or advertising device identifiers |
| ad_personalization | Receiving personalized advertising |
| ad_user_data | Sharing data with Google for its own advertising purposes |
| analytics_storage | Activation of Google Analytics features |
| functionality_storage | Storing technical settings |
| personalization_storage | Content personalization |
| security_storage | Tracking for security purposes |
Configuration
Option A: Configuring Basic Consent Mode (Recommended for strict blocking)
After performing the above steps go to the container and, in the tag list, click on the shield icon at the top right.
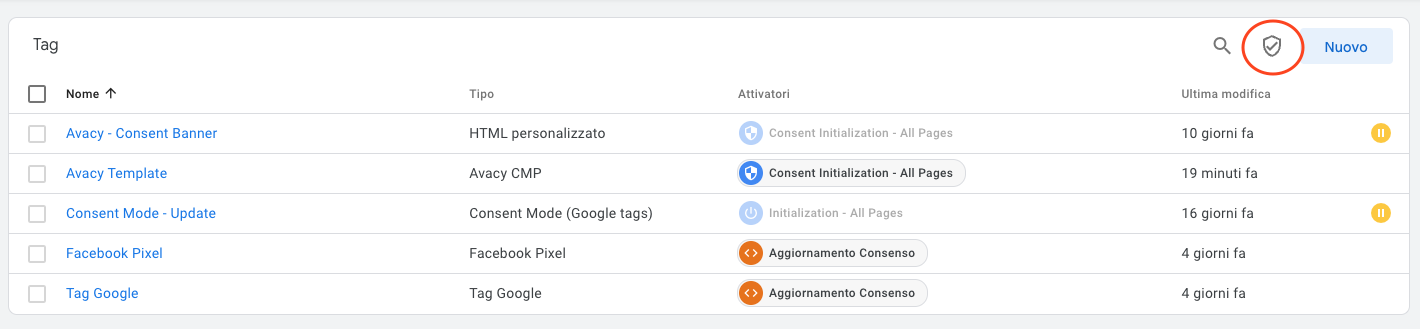
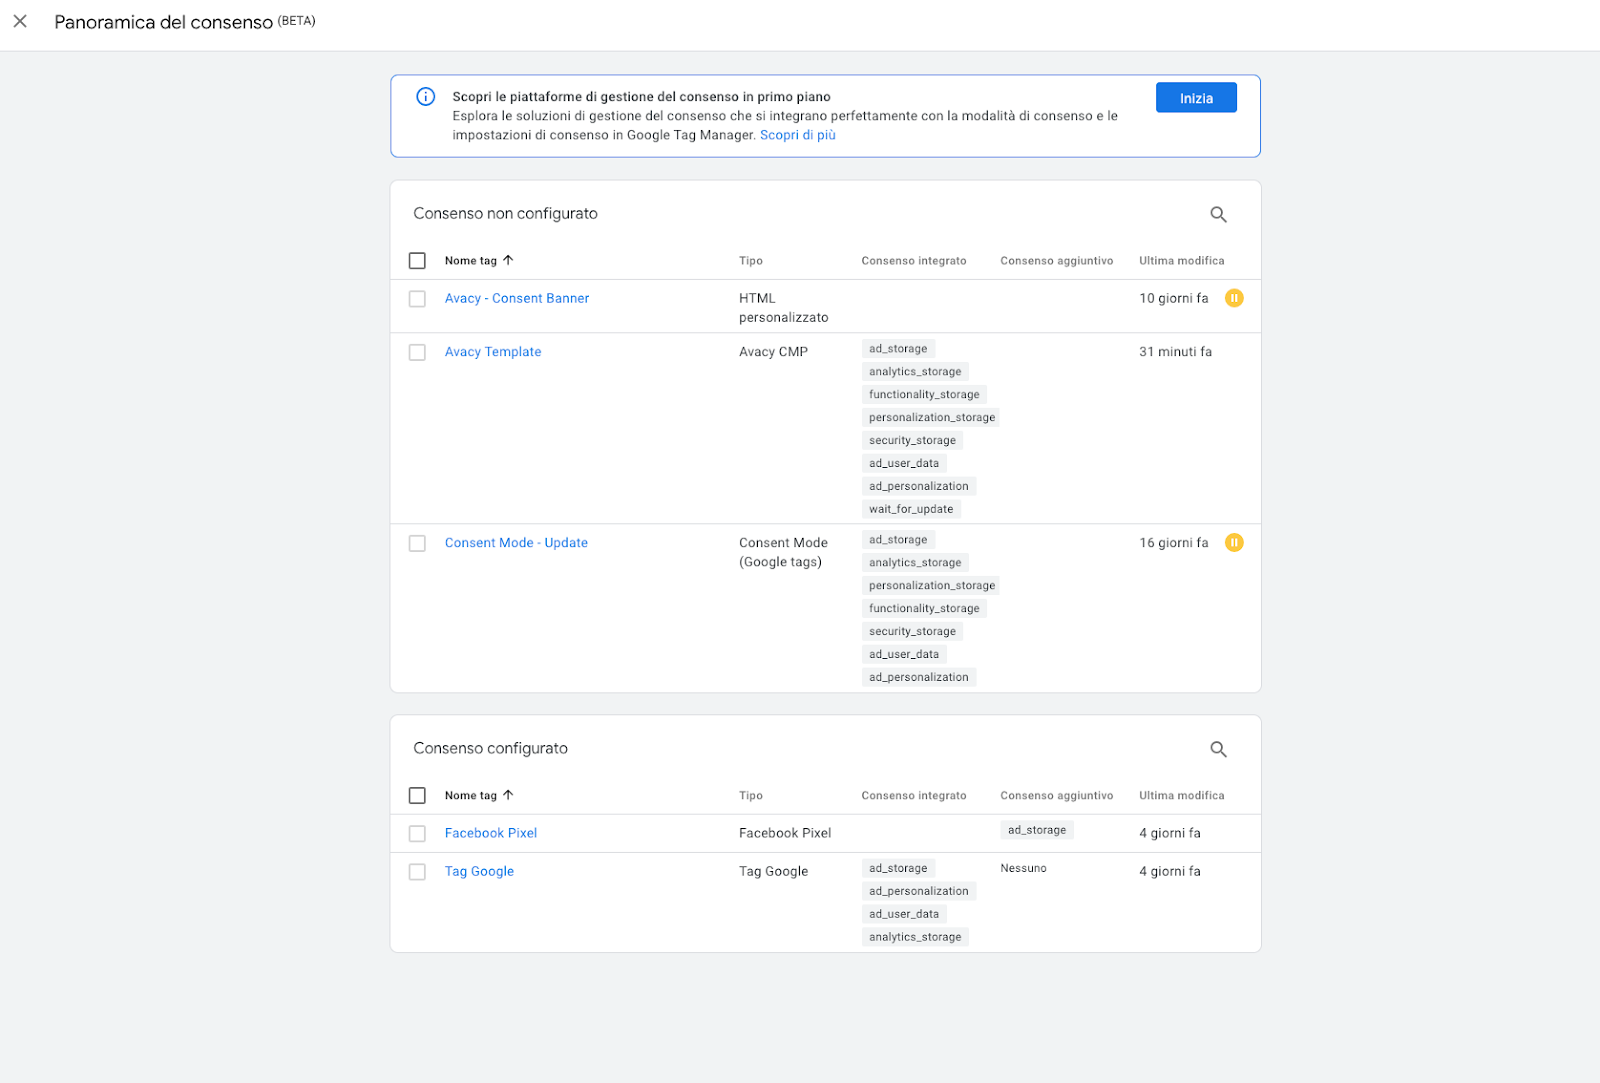
A summary of the tags will be displayed, showing those that have not yet been configured with Google Consent Mode and those that have been correctly configured.
Some tags are configured with built-in consent indicators (usually Google tags, e.g., Google Analytics) and automatically adjust their tracking services based on these indicators. Other tags do not have built-in consent indicators, so to integrate Consent Mode, you need to set additional consent indicators.
Let's take the integration of a Facebook Pixel as an example.
Once you have added the tag to the container, click on the tag to open its details. Click the pencil icon in the Tag Configuration section and scroll down to Advanced Settings. Then, click on Consent Settings and select the option Additional consent required for tag firing.
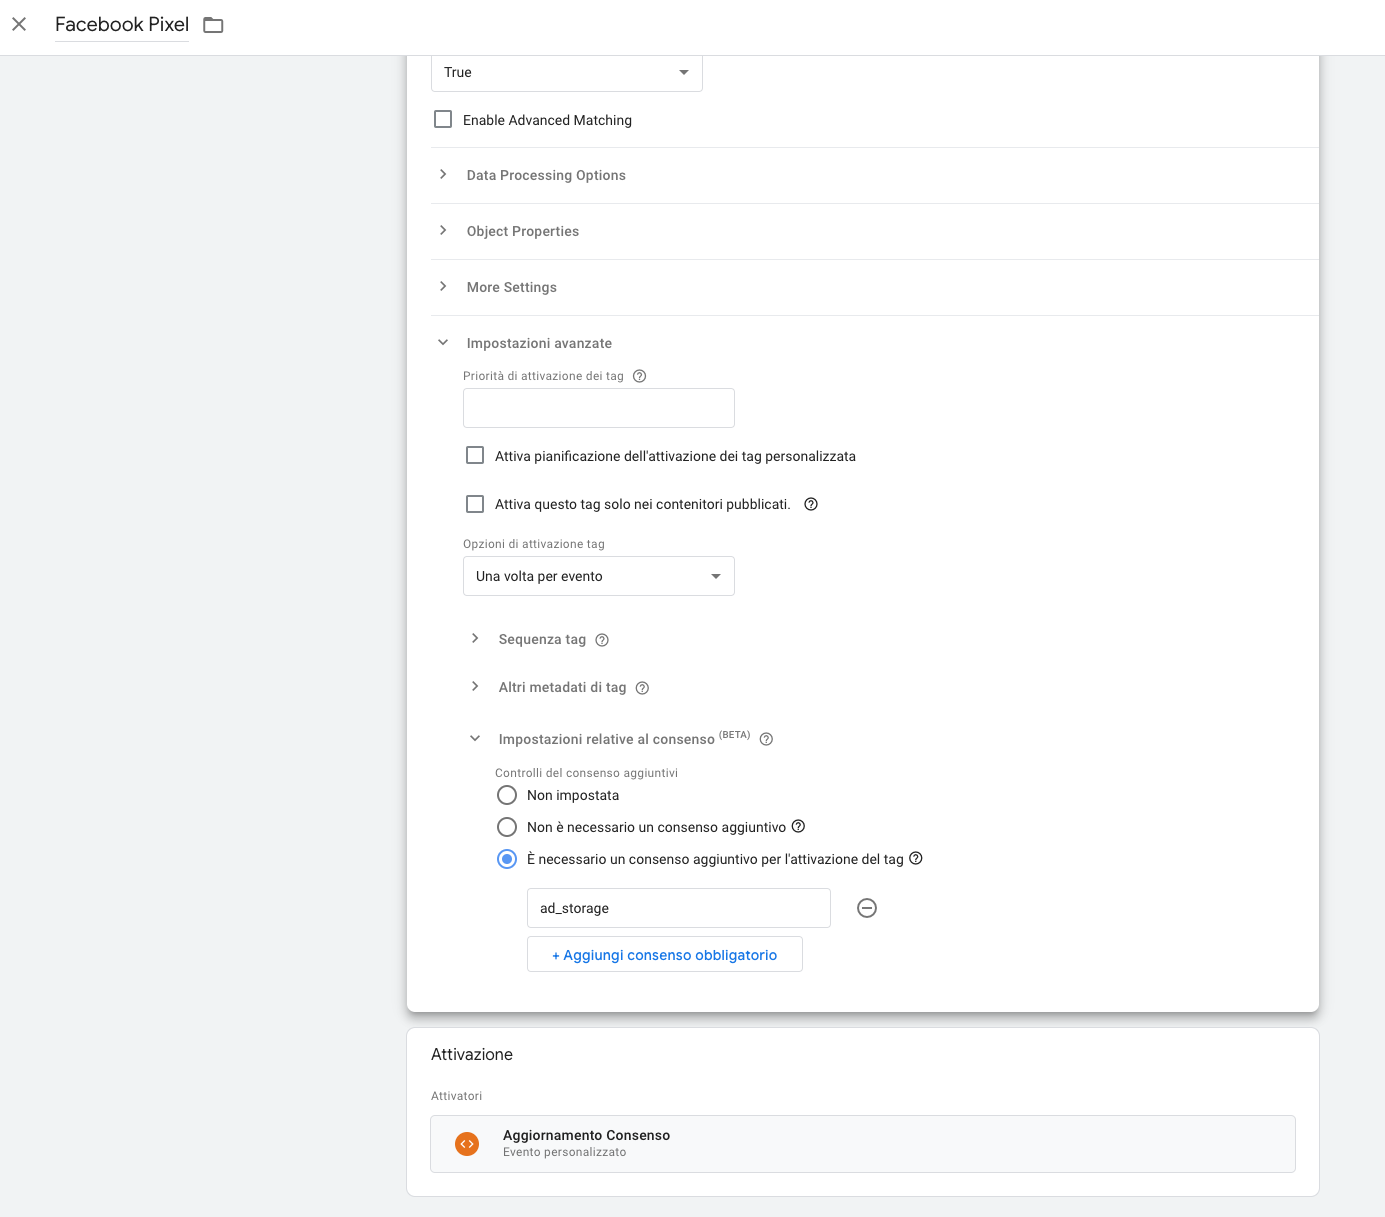
As shown in the picture, manually set one or more consent indicators supported by Google, described in the previous table.
In the Triggers section, create a new "Custom Event" trigger and set the event name to avacy_consent_update.
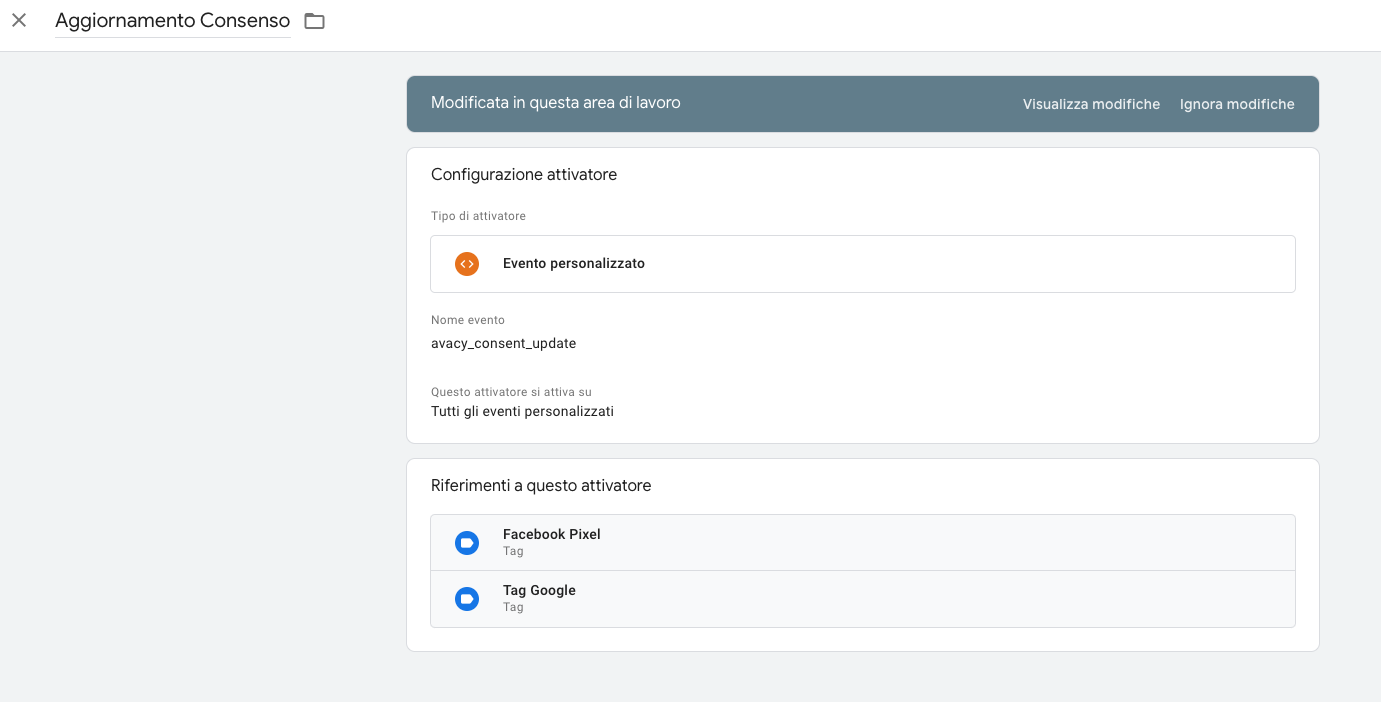
Next, link this trigger to the Facebook Pixel in the "Triggering" section of the tag.
Repeat the procedure for each tag to which you want to apply Google Consent Mode.
Testing
At this point, following the Facebook Pixel example, the tag should only activate if consent is given for the purpose related to the ad_storage indicator, in other words, if that particular feature is accepted from the platform's cookie banner.
Check the purpose related to the ad_storage indicator to launch the tags we configured with that consent indicator
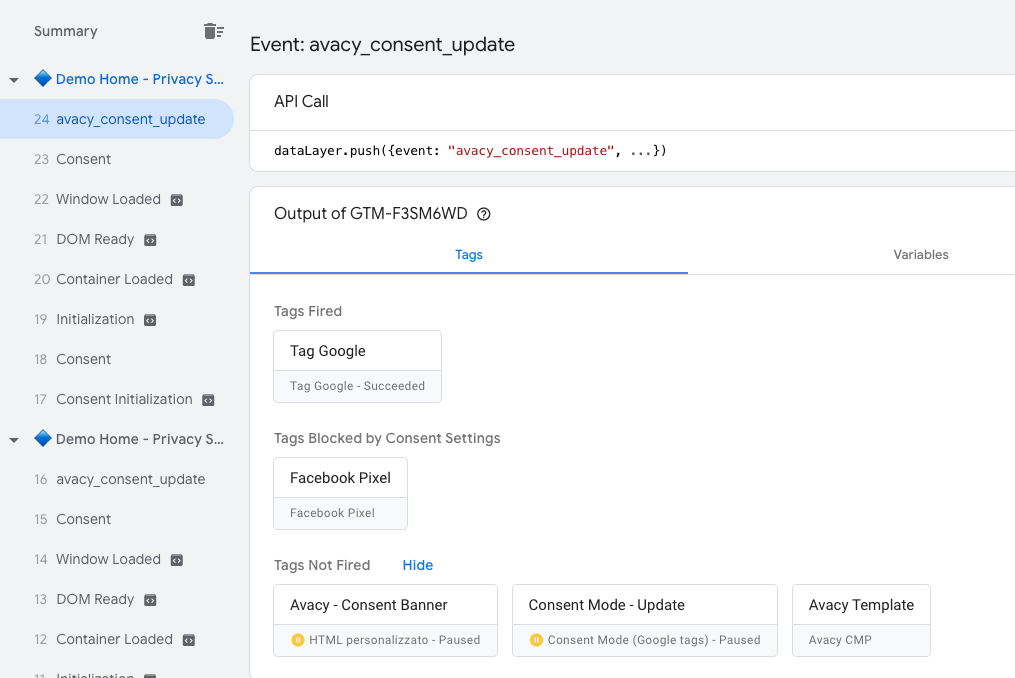
We can verify from the container preview that, by checking the Managing cookies or advertising device identifiers purpose in the cookie banner, the avacy_consent_mode event is indeed triggered through the dataLayer API. At this point, the tags triggered by this event will automatically determine whether they should be activated based on the consent indicators we specified for them.
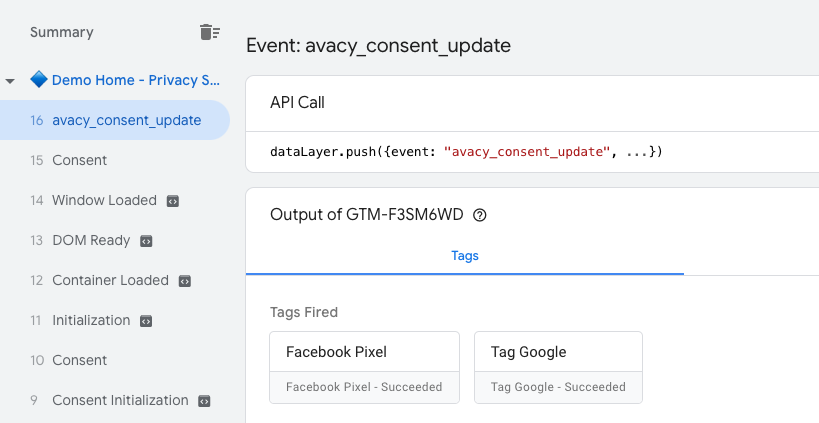
In this case, since we set the ad_storage indicator for the Facebook Pixel, we can verify from the debugger that the tag is activated when the event is triggered.
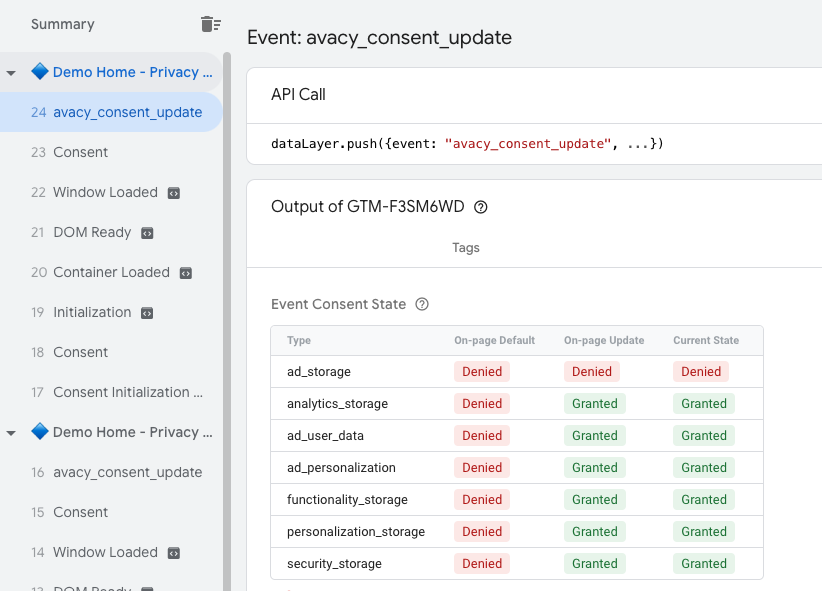
Similarly, in the Consent tab of the debugger, we can check how the consent indicators have changed based on the preferences expressed.
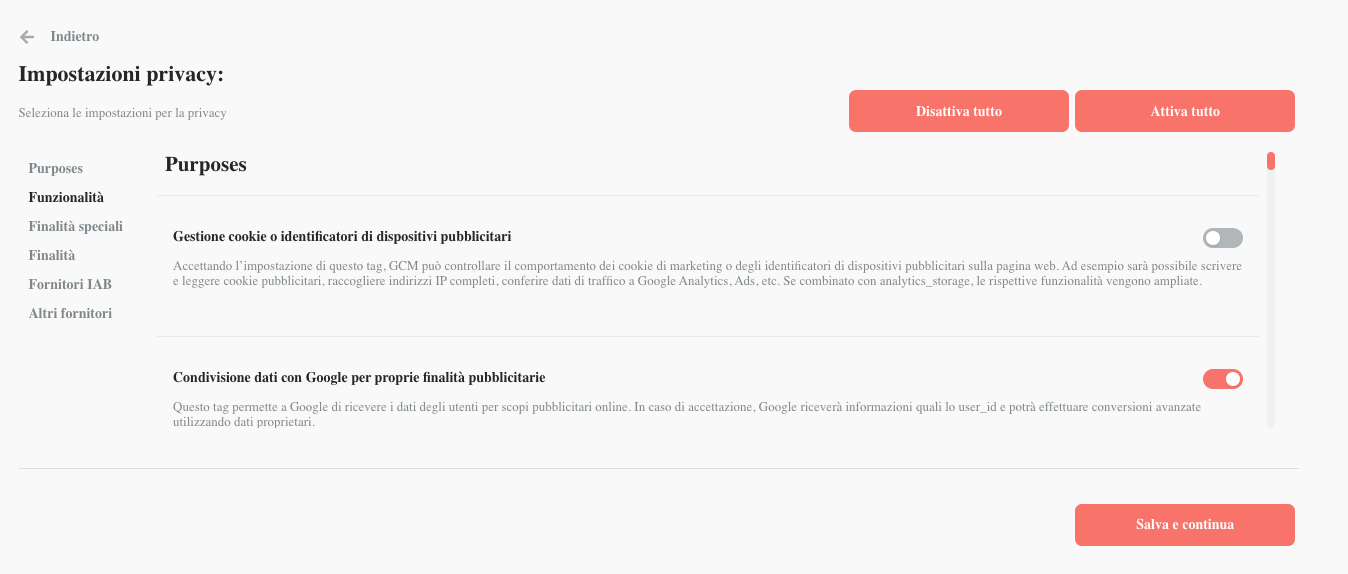
As a cross-check, we can activate all purposes except those required to activate the Pixel, and verify that it remains effectively blocked.
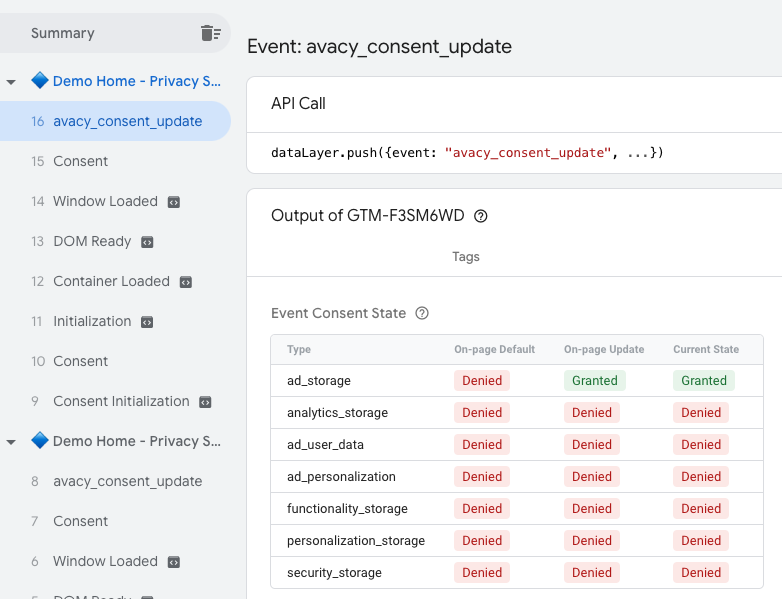
We then return to the debugger and verify that the consent indicators are set accordingly:
Finally, we verify that the Facebook Pixel remains deactivated because the necessary consent indicator was not provided.
If the result is as expected, the preventive block for the Pixel has been successfully configured.
Option B: Configuring Advanced Consent Mode (For Google Tags only)
In Advanced mode, Google tags (GA4, Google Ads, Floodlight) must load immediately to send consent pings.
Use standard triggers like "Initialization" or "All Pages". Do not use the avacy_consent_update trigger for these tags.
Ensure that "Built-in Consent Checks" are active on the Google Tag (usually active by default).
Result: Google tags will fire immediately. If consent is denied, GTM automatically restricts them to cookieless pings. If consent is granted, they process data normally.
NOTE: For non-Google tags (like Facebook Pixel), continue using Option A (Basic), as they do not support Google's consent pings and should likely remain blocked until consent is granted.